Tag Archive for: art

Illustrated Paintball Course Map
Copyright © 2016 by Brian Allen
Illustrated Paintball Course Map
Copyright © 2016 by Brian Allen
Illustrated Paintball Course Map
Copyright © 2016 by Brian Allen

Client:

Paintball GOTCHA Spielfield

Description:

I illustrated this detailed map for a paintball course in Europe, based on supplied photos and an existing map.

This map was very challenging because there were so many different areas and objects that needed to be illustrated, many with very few reference photos. The client and I were very happy with how it turned out in the end. The map will be used on their website, painted on a mural at the course, and handed out as a brochure to help their guests navigate this enormous professional paintball course.

Client Testimonial:

Thank you for everything, the map is awesome!

-Tim Bauer

Owner, GOTCHA paintball

Supplement Packaging Characters
Copyright © 2016 by Brian Allen
Supplement Packaging Characters
Copyright © 2016 by Brian Allen
Supplement Packaging Characters
Copyright © 2016 by Brian Allen
Supplement Packaging Characters
Copyright © 2016 by Brian Allen
Supplement Packaging Characters
Copyright © 2016 by Brian Allen
Supplement Packaging Characters
Copyright © 2016 by Brian Allen
Supplement Packaging Characters
Copyright © 2016 by Brian Allen
Supplement Packaging Characters
Copyright © 2016 by Brian Allen
Supplement Packaging Characters
Copyright © 2016 by Brian Allen

Client:

What The Supp

Description:

This was a series of characters I created for a supplement company for their labels, and to advertise the products in Germany.

All the custom characters were created to look hyper-jacked and muscular. Each character reflected the title of each product in a subtle way. I created a minotaur, a pistol-wielding Gorilla in a suit, and a panda drug lord.

To see more of my work, or hire me for freelance projects, please visit my website: www.flylanddesigns.com
© Brian Allen 2016
© Brian Allen 2016

Client:

West Coast Pitbull

Description:

West Coast Pitbull, a huge brand that caters to all things pitbull, hired me to create a series of apparel designs featuring the Pitbull in all his badass glory.

Our second design had me drawing a pitbull skull in a decorative Ace of Spades card design. I decided to add a lot of detail to the skull, but push the other design elements into the background to help it pop out.

The next West Coast Pitbull t-shirt design I created imagines a dark future where humanity’s only hope for survival rests in the paws of cybernetically enhanced Pitbulls designed to hunt out their enemies. I drew this pitbull on a pile of skulls because it just felt right.

I illustrated this crazy and horrifying clown for West Coast Pitbull’s new apparel series. This was a digital painting created in Adobe Photoshop – I decided to leave out all the line art in the design and try to go for a more realistic look.

Client:

The Unbroken

Description:

The New York band, The Unbroken hired me to create this insanely detailed illustration of crusaders clashing with a horde of demon soldiers, parting in the middle to show our Unbroken hero in the middle of the fray.

I love working on projects like this where I can just put my headphones on and get absorbed in all the details of each creature and soldier. It’s a challenge to keep it from becoming a tangled mess. I tried to keep all the colors limited so that the focus would rest on the solitary warrior in the middle.

I also update the band’s logo to match the illustration.

Client Testimonial:

Absolutely amazing! The guys love it!

-Jason Lekberg

Manager, The Unbroken

To see more of my work, or hire me for freelance projects, please visit my website: www.flylanddesigns.com
© Brian Allen 2016

Client:

Take A Break

Description:

Bass fishing illustrations I created for Take A Break clothing.  We wanted to take a sort of harder, more stylized and graphic edge to these designs, in contrast to the hyper-realistic renderings out there.  These were separated for silk-screen by the client – I took care to use only a limited number of colors in the design to make that easier.  I have a couple in my closet – they turned out great.

Spawn Tribute Illustration for 2
Copyright © 2016 by Brian Allen
Spawn Tribute Illustration for 2
Copyright © 2016 by Brian Allen
Spawn Tribute Illustration for 2
Copyright © 2016 by Brian Allen

Client:

Paintball GOTCHA Spielfield

Description:

The artist Chogrin invited me to participate in a Spawn tribute book to celebrate the 25th anniversary, that would be presented to Spawn creator, Todd McFarlane.

I create the entire artwork on the iPad Pro in Clip Studio Paint. The screen is so bright I can work outside in my backyard – it’s great to take a break from the big screen every once in a while and stare at a little screen instead.

Hot Sauce Label Illustrations
Copyright © 2016 by Brian Allen
Hot Sauce Label Illustrations
Copyright © 2016 by Brian Allen
Hot Sauce Label Illustrations
Copyright © 2016 by Brian Allen
Hot Sauce Label Illustrations
Copyright © 2016 by Brian Allen
Hot Sauce Label Illustrations
Copyright © 2016 by Brian Allen
Hot Sauce Label Illustrations
Copyright © 2016 by Brian Allen

Client:

Shrunken Headz Hot Sauce

Description:

Shrunken Headz Hot Sauce hired me to illustrate the logo for their company, two labels, and even design a 3D plastic topper for all their bottles.

The first design was an evil demon clown with a grungy circus background, and the second was a creepy scarecrow with an apple for a head instead of a pumpkin. For the logo, I created this fun and creepy shrunken head with flames shooting out its ears. They liked the logo so much that they hired me to illustrate a turnaround illustration of the head so a 3D modeler could create a plastic capper for the bottles.

Client Testimonial:

Holy ***! That looks so wicked! Thanx Brian. Another masterpiece to add to your collection!

-Jesse Strokes

Owner, Shrunken Headz Hot Sauce

Naughty Coconut Packaging Design
Copyright © 2016 by Brian Allen

Client:

Naughty Coconut

Description:

This brand of coconut milk called Naughty Coconut hired me to illustrate and design the labels for each of their many flavors, featuring this sexy coconut lady between two palm trees.

The bottle was very small, so had to come up with a design that would be legible at only 2 inches tall.A

Hand-painted Tiki Skateboard Dec
Copyright © 2016 by Brian Allen
Hand-painted Tiki Skateboard Dec
Copyright © 2016 by Brian Allen
Hand-painted Tiki Skateboard Dec
Copyright © 2016 by Brian Allen
Hand-painted Tiki Skateboard Dec
Copyright © 2016 by Brian Allen
Hand-painted Tiki Skateboard Dec
Copyright © 2016 by Brian Allen

Client:

Simon Rivers

Description:

A private collector commissioned me to paint this one-of-a-kind tiki totem skateboard deck in acrylic on wood.

I designed the different tiki heads digitally in Clip Studio Paint, and then transferred the sketch to the board using carbon paper. Using acrylics, I blocked in the colors and began adding highlights and shadows. Then, when all the colors were added (which was the most time consuming part of the process), I painted the line work with a brush and black ink. The client was so much fun to work with – he wanted the entire thing to be a surprise, so he never saw any sketches or progress shots. I don’t do a lot of traditional painting, so I was unsure how it would turn out, but I’m very happy with it.

Moonshine Bandits Skeleton Eagle
© Brian Allen 2016
Moonshine Bandits Skeleton Eagle
Copyright © 2016 by Brian Allen
Moonshine Bandits Skeleton Eagle
© Brian Allen 2016

Client:

Moonshine Bandits

Description:

T-shirt design and poster I was hired to create for the popular band, the Moonshine Bandits, of a skeleton eagle holding two smoking pistols. Set up for silk-screening with under six colors.

Client Testimonial:

Badass! Love it all.

-Dusty Dahlgren

Moonshine Bandits

Iron Horse Mud Ranch Illustrated
Copyright © 2016 by Brian Allen

Client:

Iron Horse Mud Ranch

Description:

I was hired to create this detailed map for Iron Horse Mud Ranch, known as one of the best off-road parks in the country.

Located in Perry, Florida, this sprawling estate hosts monster trucks, ATVs, and just about anything with wheels on an insane course of obstacles, tracks, and millions of gallons of mud. 

The client submitted aerial and onsite photos that I pieced together into a blueprint for the map. Once we had the locations of everything fixed, I laid out all the elements and hand-illustrated all the cars, trucks, booths, tents, and other elements in Adobe Illustrator as a vector graphic. The map will be used as a printed brochure for guests, on their website, and on a 9 foot tall banner to display at the park.

Client Testimonial:

It looks SUPER GOOD! I really appreciate it.

-Keegan McNalley

Iron Horse Mud Ranch

Gangster Zombie LoudMouth Gloves
Copyright © 2016 by Brian Allen
Gangster Zombie LoudMouth Gloves
Copyright © 2016 by Brian Allen

Client:

LoudMouth

Description:

I illustrated this zombie gangster character for the popular football glove company, Loudmouth.

The gloves are designed to wrap across both gloves, so they show the full illustration when the hands are placed on top of one another. The client was extremely fun to work with, and I can’t wait to get my pair.

Client Testimonial:

LOVE IT!!!

-Kevin Gniadek

Loud Mouth

Game of Thrones Bam Box Illustra
Copyright © 2016 by Brian Allen
Game of Thrones Bam Box Illustra
Copyright © 2016 by Brian Allen
Game of Thrones Bam Box Illustra
Copyright © 2016 by Brian Allen
Game of Thrones Bam Box Illustra
Copyright © 2016 by Brian Allen
Game of Thrones Bam Box Illustra
Copyright © 2016 by Brian Allen

Client:

The Bam Box

Description:

So excited to share this Game of Thrones illustration I created for Bam Box, featuring Daenerys Targaryen and the Night King and their dragons.

Every month, the geek loot box company, Bam Box, sends out awesome surprise packages to their subscribers featuring artwork and other merch from the latest pop culture obsessions. They gave me a ton of freedom with this commission. I thought it would be cool to draw the two characters and their dragons as opposing forces, and highlight the blue and red dicotomy of fire vs. ice. When I was finished, I signed close to a 1000 of the prints to be sent in their loot box.

Evil Dead 2 Necronomicon T-Shirt
Copyright © 2016 by Brian Allen
Evil Dead 2 Necronomicon T-Shirt
Copyright © 2016 by Brian Allen
Evil Dead 2 Necronomicon T-Shirt
Copyright © 2016 by Brian Allen

Client:

Cavity Colors

Description:

Cavity Colors hired me to create this officially licensed t-shirt illustration of the Book of the Dead, the Necronomicon, from one of my favorite horror movies ever, Evil Dead 2.

I took great care to make the illustration look like the specific book from the movie (the books all look slightly different in all the other movies). I made sure to use limited colors so it would silk-screen nicely. Very happy with how this turned out!

Client Testimonial:

I’m so excited for this design. Looks so good!

-Aaron Crawford

Art Director, Cavity Colors

Tiki Truck Wrap
Tiki Truck Wrap
Copyright © 2016 by Brian Allen
Tiki Truck Wrap
Copyright © 2016 by Brian Allen
Tiki Truck Wrap
Copyright © 2016 by Brian Allen
Tiki Truck Wrap
Copyright © 2016 by Brian Allen
Tiki Truck Wrap
Copyright © 2016 by Brian Allen
Tiki Truck Wrap
Copyright © 2016 by Brian Allen
Tiki Truck Wrap
Copyright © 2016 by Brian Allen
Tiki Truck Wrap
Copyright © 2016 by Brian Allen
Tiki Truck Wrap
Copyright © 2016 by Brian Allen
Tiki Truck Wrap
Copyright © 2016 by Brian Allen

Client:

Diamond Wraps

Description:

This wrap design I created using my tiki artwork won first place in a vehicle wrap competition 360 Carshow!

Diamond wraps did a hell of a great job printing this on vinyl and wrapping their beautiful truck in the design. They even customized an amazing bamboo truck bed that looks just beautiful. Using their photos and measurements, I created a template of the vehicle, and carefully designed the text and artwork layout to fill the unique shape of this low-rider truck. So proud to have won first place!

Client Testimonial:

Thanks again, Brian. I’ve been following you for a long time and have wanted to get this done through you forever, so it’s definitely and honor to have you be a part of this project. 

-Jesse Jacobs

Owner, Diamond Wraps

Breaking Bad Pinball Playfield I
Copyright © 2016 by Brian Allen
Breaking Bad Pinball Playfield I
Copyright © 2016 by Brian Allen
Breaking Bad Pinball Playfield I
Copyright © 2016 by Brian Allen
Breaking Bad Pinball Playfield I
Copyright © 2016 by Brian Allen
Breaking Bad Pinball Playfield I
Copyright © 2016 by Brian Allen
Breaking Bad Pinball Playfield I
Copyright © 2016 by Brian Allen

Client:

Tim Fife

Description:

A private collector hired me to completely redesign his pinball playfield with a custom Breaking Bad theme.

We started the process by photographing the original Judge Dredd pinball table, and scanning it into the computer. I then started carefully drawing the different Breaking Bad characters into positions that would make sense for the game. I tried to draw as many characters as I could fit, like Gus Fring, Hank, Jesse Pinman, Mike, Saul Goodman, Skyler, Tuco, and of course, Heisenberg. The client had a bunch of great ideas, such as adding in the pink teddy bear, and the fly that drove Walter White on a frantic quest around the lab to extinguish it.

After the illustrations were complete, I laid out all the text, arrows, and ramps.

The project was insanely time-consuming, but I’m very proud of it. It will now be carefully printed onto the wood. Can’t wait to see it as part of a the whole Breaking Bad custom pinball cabinet!

Adding mind-frying detail on this psychedelic tapestry illustration for a favorite client of mine. via The Art of Brian Allen – Flyland Designs http://ift.tt/2C3Xuks

via IFTTT Multistreaming with https://restream.io/ https://youtu.be/XZvzZX8H0AU

via IFTTT Hey, Guys a few months ago I got the iPad Pro 10.5 and tried it out. I thought it would be cool to make a review of it and let you all know how it worked out for me.

Tutorials, Reviews, and Artwork by Freelance Illustrator Brian Allen of FlyLandDesigns.com

—————————
Buy my custom Clip Studio Paint brushes at http://ift.tt/2k3xziy
—————————

To check out more of my work, or to hire me:
http://ift.tt/1iHMA4f

Follow me on Facebook:
http://ift.tt/2noel9I

On Instagram:
http://ift.tt/2p6mPDN https://youtu.be/yDsalLCa2ZY

Here’s my finished tribute to The Great Mouse Detective. Professor Ratigan from the film is one of the slickest animated villains ever. Thinking about wearing a cape. via The Art of Brian Allen – Flyland Designs http://ift.tt/2y6ScSi

OK – here are finished pencils for my poster and t-shirt for Nightmare on Chicago Street 2017 on October 21 – time to ink! They invited us to come out to the show and be a vendor there, which we abruptly replied “hell yes!” #elginnocs via The Art of Brian Allen – Flyland Designs http://ift.tt/2gyUxzm

Very excited to be working on an event poster for the Nightmare on Chicago Street – I decided to draw the poster on paper initially instead of digitally so I could really fine-tune the details. More to come soon! via The Art of Brian Allen – Flyland Designs http://ift.tt/2ydIHlM

Purple heart eagle design I created for a client’s line of patriotic decals. Drawn and colored in Manga Studio 5 via The Art of Brian Allen – Flyland Designs http://ift.tt/2y9nI3n

Digital ink illustration of our favorite crime family from the Goonies. I’m experimenting with a new quicker, rougher style in Manga Studio using my wash brushes and textured ink pens. I really like the result, any feedback? via The Art of Brian Allen – Flyland Designs http://ift.tt/2zaSyZw

Hey guys I’m drawing and rambling LIVE right now on YouTube, Twitch, and Facebook – please throw me your questions and I’ll try to answer! via The Art of Brian Allen – Flyland Designs http://ift.tt/2wDkiol

Don’t Tread On Me eagle and snake I illustrated for a client’s line of patriotic vinyl decals. This is my favorite one to date – available for licensing if anyone is interested. via The Art of Brian Allen – Flyland Designs http://ift.tt/2fSH5ZZ

Parody sketch I’m inking of a thug Goofy in Manga Studio 5

Colorful clownfish in an underwa

Rick and Morty Parody surrounded by all the evil characters from their show.
Accessorize your Morty and get swifty with this detailed and dark tribute to the greatest dimension traversing duo, Rick and Morty. Featuring creatures that defy all logic. 100 years Rick and Morty!
Rick and Morty RIck and Morty Rick-and-Morty-Art-Print-signed

Client:

Personal

Description:

Accessorize your Morty and get swifty with this detailed and dark tribute to the greatest dimension traversing duo, Rick and Morty. Featuring creatures that defy all logic. 100 years Rick and Morty!

This was created for an official Rick and Morty design contest, and the design won third place! The shirt will be available for sale in the official Rick and Morty outlets. I’m super-thrilled to have my artwork hand-picked by the creators of one of my favorite shows. In addition to the prize money, I’ll also be getting a sweet Rick and Morty comic book autographed by the creators!

Over 110 new Volume 2 Custom bru


TUTORIAL 3 0f 3 – COLORING

VIDEO 3:  https://youtu.be/10FCEL_Nv90

    1. Flats

      1. “Flatting” a piece consists of coloring the basic shapes of the illustration in random, unique colors to differentiate the different elements from each other in order to make quick selections when coloring.
      2. Once finished, you set this Flats layer as a Reference layer in Clip Studio Paint.
        1. Using reference layers makes coloring much faster, because you can use the magic wand tool to select quick masks of certain areas, without having to switch the layer you are working on.
    2. Create a Color Comp

      1. I always experiment with color BEFORE I begin working on the final piece.
      2. Duplicate your document and reduce to 72 dpi.
      3. Gather reference of great color schemes and environments for inspiration.
      4. On a layer set to overlay above all other artwork, experiment with different color schemes.
      5. Quickly (for just about 15 minutes) use a large soft airbrush to block in colors.
        1. Don’t worry about staying in the lines or coloring small portions of the illustration.  Just focus on making color choices for the most important parts of the illustration.
      6. Because the image is small, and because you are being very loose and rough, this encourages you to take risks and experiment with color schemes you may not have considered.
      7. Once you’re happy with a color scheme, save the document as a flat jpg.
      8. Load the color scheme into Clip Studio Paint’s SubView pallette.
        1. This will now be a handy pallette you can use when coloring the real thing.
    3. Colors


  • SETUP


        1. Open up your original document.
        2. Resize your main illustraiton to 300 dpi (previously set at 600 dpi for inking).
        3. Duplicate your Flats Layer and name it Colors (this is the layer you actually paint on), and keep it below your Line Art layer.
          1. Make sure Lock Transparency is turned on to prevent you from painting outside of the layer area and onto the background.
        4. Fill the Colors layer with one solid color
          1. Usually I like to use a desaturated blue with a neutral value.
          2. You don’t want the random colors you used for Flatting to distract you.
        5. Color in background with a solid color behind all other layers.


  • COLORING


        1. Rough in background colors
          1. It’s important to block them in, because it sets the tone and contrast for the figure.
          2. I used my custom textured watercolor brushes to fill in the background quickly.
        2. Block in colors on character
          1. Attack the Local Colors first.  Objects with a Local Colors are things such as an apple, which is generally accepted to be red when shown in white light.  Local Colors will still be influenced by the color of the lighting, but identifying them early can help calibrate the color balance of your piece.
        3. Put in large gradient color fades to areas that fade from one color to another.
          1. Use a large soft brush or the gradient tool to put in large color transitions in the piece.
          2. I like to use a soft brush with a little texture in it, so that the color transition blends look more natural.
        4. Add hard edged cast shadows
          1. Set new layer above Colors layer, and set to Multiply
          2. Paint with a very desaturated, light value purple/blue color to paint the hard shadows.
          3. Follow the lineart, and add volume to the forms by hugging the edges with your brush.
          4. Don’t introduce a lot of rendering information at this point.  Just paint in some of the midtones – let the line-art do the work for you and just compliment it.
          5. Use hard-edged brushes when cast shadows are more intense.
        5. Add Highlights
          1. The illustration at this point should look rendered, but a little dull and desaturated and a bit flat.
          2. The highlights and rim lights will do the final rendering, and help tell the viewer what to look at.
          3. Zoom in a bit closer now
          4. Merge the Multiply Shadows layer down with the color layer
            1. We will be painting over top of the shadows.
          5. Always be mindful of the direction and color of the lighting.

        6. Use the “Lasso Cut and Gradient” method to color sharp, high-contrast areas.
          1. Make a selection with the lasso tool, and use a soft brush to paint inside that area.  
          2. The brush should be touching one edge of the marquee, but the fade should not touch the opposite end.
        7. Add Rim Light around the edges of the figure.
          1. Create new layer above color and line-art
          2. The rim light will be a slightly darker, desaturated shade of the color of the lighting itself
          3. Start with a soft brush around the edges of the form, and then use a harder edged brush with a brighter highlight along the edge.
        8. Finish background
          1. Keep it blurry and less sharp than the foreground figure.
        9. Create glow effects
          1. Add separate layer on top of all artwork and set layer to Screen Blending Mode.
          2. Punch up selected areas of the piece that need to be brighter and in focus.
          3. Use a darker, desaturated color when doing this, and press very softly so you don’t blow out the area and make it too bright.


  • Lineart Knockouts


          1. “Knockouts” are when you color parts or all of the lineart so it isn’t just black.
          2. This is a really effective way to make areas appear brighter and to make the piece as a whole appear less flat.
          3. Set your line art layer to Lock Transparency to prevent you from painting outside of the lineart.
          4. Find the areas closer to the lightsource, and color the line art with a darker version of that color.
          5. Especially effective on background elements that you want to appear some distance away.


  • Add Texture


        1. To add character to the piece, use grungy brushes and textures on a layer set to screen, multiply, or overlay (depending on the piece) and lightly paint textures in some areas.
      1. Adjust colors
        1. Take a step back and make final tweaks to the color scheme if needed
        2. Make slections with your Flats layer, and use Edit>Tonal Correction> Hue/Saturation to adjust colors.
      2. Add Atmospheric Effects
        1. Create a new “Effects” layer above all others.
        2. To add even more depth to your piece, find areas of your figure that would be farther back, and lightly paint over them with the color of the background.
        3. This creates the illusion that more atmosphere is between you and the object, and pushes it into the background, similar to the way mountain ranges appear to have less and less contrast as they go back farther into the distance.

And we’re done!

Thank you so much for following my tutorial.  If you have any questions, please feel free to comment on my YouTube videos.

Brushes used:

If you would like to purchase any of the brushes I used in this tutorial, they are available at http://ClipStudioPaintBrushes.com

Follow Brian and check out more of his work:

https://www.flylanddesigns.com

Follow me on Facebook:

https://www.facebook.com/brianallen.flylanddesigns

On Instagram:

http://instagram.com/flylanddesigns_brian_allen

On YouTube:

https://www.youtube.com/user/flylanddesigns

Over 110 new Volume 2 Custom bru

The Artwork:

For this tutorial, I decided to create a tribute illustration to one of my favorite animated movies, Wizards by Ralph Bakshi.  I chose to illustrate the iconic poster from the movie, featuring the character Peace.  I thought a rendering my own stylistic approach to an existing piece of artwork would be a great vehicle for a tutorial, because the foundation has already been set, and we can focus instead on the technique.

Ralph Baksi’s original classic poster art. Tribute illustration we will be creating in this tutorial.

TUTORIAL 1 0f 3 – PENCILING

    1. Document Setup

      1. I set up most documents at 300 dpi 20×20.  
        1. It’s very important that anything you are hoping to print be set up at 300 dpi.  72 dpi will print out pixelated, and will get too distorted if you ever need to increase the size.
      2. Create a New Window and shrink it to about 25% the size of your main window.
        1. This is a smaller live preview of your image that will help you keep an eye on your composition as a whole.  
      3. VIEW>ROTATE/INVERT>Flip horizontal window.
        1. This will help you spot errors by having a view of your illustration mirrored.
        2. Better than photoshop because you’re not actually flipping the artwork, just the view of it, without m
      4. Set up separate layer groups for the sketch, pencils, inks (with pre-made action)
        1. Encourages me to take the time to rough and plan the piece first
        2. The Layer Color effect of each group is set to magenta, non-photo blue, and black respectively, so everything I draw in those layers will appear as that color.


  • TOOLS
  • Full list of tools https://www.flylanddesigns.com/faq-for-artists/
  • Wacom Cintiq 24HD
  • iMac 5K 27”
  • Nostromo Razer Gamepad


          1. For keyboard shortcuts
    1. Gather Reference

      1. Do plenty of research before you start drawing
        1. Especially technical items that you may not have drawn before
        2. Getting them right adds a lot to your piece
        3. Do research on settings, environments, and lighting
      2. Gather inspiration for color schemes and styles
        1. You often won’t take essential risks unless you see that it’s been successful in another piece
        2. Encourages you to try things you wouldn’t have otherwise
      3. Reference is a tool
        1. Don’t become overly dependant on it, but don’t go without it either.
        2. Do not copy – use only for inspiration


  • Drawing the Thumbnail sketch


      1. Stay way zoomed out
        1. This will help you focus on just the overall shape of the design and avoid getting sucked into detail work
      2. Focus on skeletal structure and main shapes
      3. Make sure that your figure has a strong sillhouette
        1. This means, if your character was filled entirely with black, you should still be able to differentiate it’s parts, and it should look interesteding.  If it looks like a big blob, you may need to make adjustments.
    1. Pencils

      1. Turn your thumbnail opacity down
      2. Begin drawing in the Pencils Layer group
      3. Flesh out the details and shapes, making sure to use a lot of circles and curved strokes.
      4. This drawing can still be really rough – main details will be accomplished in the inking stage.
      5. Don’t focus on the style of the lines yet, or line weights – just focus on the outlines of the different shapes.
      6. Once you have cleaned up your pencil drawing and constucted the main shapes, go in with hard pencil and clean up details
        1. You do not need to trace over everything – just the focus points that need work.
      7. This drawing is only a guid to help you in the inking stage.  So you can skip over parts that you think you can handle confidently in the ink stage.


  • Shading layer


Quickly rough in the mid tones with a broad shading brush on a layer above set to Multiply.

Go To Part 2 of 3 - Inking

Next I’ll show you how I ink artwork in Manga Studio 5 (Clip Studio Paint)

Happy the Clown says check out my new Artists’ Resources page I built on my website. I collected tutorials, FAQs, tools, reviews, and other helpful stuff all in one place. I’ll be adding to it constantly. Anything more you want to see?

Screenshot_2015-12-31-13-52-39-700px

Screen Shot 2015-11-22 at 12.39.32 PMI’m so excited to be sharing this – some of my work was published in Black and White Volume 2 by Out of Step Books, a collection of artwork from some of my favorite artists, like Freak City and Ben Kwok (Bioworkz).

Words can’t describe how flattered I am. Seems like I must be doing something right!

Can’t wait to pick up my copy at OutOfStepBooksScreenshot_2015-12-31-13-35-42-700px

I was recently hired by Ring Thip to reinvent their packaging for their Thai Tea.  They wanted a bolder and more contemporary design, as they make a push to reach more retail markets.

I found this project to be very challenging, because the subject matter was so different, and I had limited space to make an impact.

Each flavor will have a different illustration emerging from the ring.

Bottle label design for tea featuring illustration.

I was recently hired by Ring Thip to reinvent their packaging for their Thai Tea. They wanted a bolder and more contemporary design, as they make a push to reach more retail markets. I created the label for their showcase Thai Tea product, as well as labels for the rest of their line.
I found this project to be very challenging, because the subject matter was so different, and I had limited space to make an impact.
Each flavor will have a different illustration emerging from the ring.

Click here to see more of my Illustrations.

Freelancing solo can be a pretty lonely gig. I try to keep in touch with other artists I’ve met to exchange tips and guidance (and also a lot of complaining and whining) – but everyone has a pretty busy schedule, and it can be hard to make time.

So I started listening to art and design podcasts, which are packed with useful direction and inspiration. I’ve learned more from listening to these shows about contracts, agents, clients, technique, pricing, copyrights, and more than I probably had ever known.  You can listen to these in iTunes, or straight from their websites.

Here are my top three favorites:
adventures

1. Adventures in Design

http://www.aidpodcast.com/

Easily my favorite podcast in general, not just about design.  I have learned so much from these guys.  They are also incredibly funny, so it really makes the time fly while working listening to their commentary.  Their focus goes far beyond just gig posters (which both artists got their start in), and branches into illustration, graphic design, and most of all, the business of freelancing.  They are also brutally honest and candid.  They often interview very talented artists on the show as well, which brings in a lot of different perspectives.

And finally, you get the feeling that these guys are leaders in fighting for freelance artist’s rights –  defending against the horrors of design contests, spec work, low-pay, and other naughty things.
I highly recommend this – I recently discovered it, so I’m still catching up (I’m on episode 25).  The show is still ongoing.

tumblr_static_bipt_blog_banner

2. Big Illustration Party Time

http://illustrationparty.tumblr.com/

The format of this show is actually similar to Adventures in Design:  two talented artists with different but complimentary personalities talking shop about freelance illustration and design.  Unfortunately, the show is no longer ongoing, but there are 54 episodes which cover everything from artist agents, pricing, contracts, and other important things.  I find it so helpful because these are things that as freelancers we all need to know – yet they are difficult things to discuss with your peers because we are all at the same time colleagues and competitors.  What I take away the most after listening to this show is that no matter what level you are at currently, all freelance artists are fighting the same battles.

header_1000

3. Art & Story

This podcast is also no longer on-going, but there are almost 200 episodes in the archives.  This podcast explores freelance illustration from the comic book market perspective.  I don’t work much in that market, however, I still found their interviews and tips very helpful.

What are your favorites?

Please let me know in the comments – I’m sure I’m missing some good ones.

I’ve been using Manga Studio 5 for over a year now, and I love it.  I set out to make a quick YouTube review of it, and “quick” quickly turned into over 15 minutes of me rambling.  There are so many cool new tools and features in MS5, that it was really hard to fit them all in.

If you’re considering purchasing new art software, you’ll definitely want to check this out.

 Watch the Full Video Review:

In Summary:

Manga Studio 5 Compared to Adobe Photoshop:

There are a TON of things that Manga Studio does better than Adobe Photoshop.  Can it replace it?  Maybe someday – but for now I think Adobe Photoshop is irreplaceable.  That being said, I use Manga Studio for 90% of all the artwork I create.  I usually use Adobe Photoshop for any work involving text, and for certain filters.

Manga Studio 5 sets out to out-shine Adobe Photoshop as a digital painting and drawing software, and in my opinion, it does that beautifully.

I find it far more enjoyable to use than Photoshop at painting, drawing, and especially inking.  It blends the intuitive painting and blending engines of Corel Painter with Adobe Photoshop’s intuitive interface and power.

Here’s a sample of some of the artwork I created in Manga Studio 5:

What’s Totally Freaking Awesome About Manga Studio 5

Features that you won’t find in Adobe Photoshop

  1. It’s CHEAP!

    1. It’s hard to compile a benefits list without mentioning the fact that it’s butt-loads cheaper than Adobe Photoshop.
    2. I’m currently using the Adobe Creative Cloud, Photographer’s bundle, which is only $10 a month (hard to complain about that).  But even at that price, it still ends up being $120/year.
    3. Manga Studio 5 is currently only $35 on Amazon.com:  Purchase it Here
  2. Paint with Transparency – my favorite feature

    1. Manga Studio 5 easily lets you switch to transparency as a color on the fly, making any brush instantly into an eraser.  Great for cleaning up linework, inking with “white,” and “erasing” away paint strokes that you laid on too heavy.
  3. Reference layers – extremely helpful tool when coloring

    Reference layers are an incredible concept, that I’ve never experience before in any other program.  It works like this:

    1. Choose any layer (or even a group of layers) to act as the Reference Layer by clicking the lighthouse icon in the layer menu.
    2. Now select a different layer.
    3. Choose a tool such as the magic wand, paintbucket, or eye-dropper, and make sure it is set to “Refer To Reference Layer.”
    4. Now, watch in amazement as the paint bucket fills, the wand selects, the eyedropper… uh, drops using data not from the layer you are editing, but from the reference layer!So what is this useful for?  I use it all the time when coloring artwork.  I create a flat color layer under my lineart, with no shading.  Comic book artists refer to these as “Flats.”  Then I create a new layer above the Flats, and set the Flats as a reference layer.  Now, as I color, I can quickly switch between the magic wand and my brush, and the magic wand makes selections based on the Flat layer.
      In Adobe Photoshop, I would have to constantly hide my color layer, switch to my flats layer, make the selection, unhide my color layer, switch back to the color layer, and paint.  Reference Layers in Manga Studio save me so much time.  And the same concept works for the paint bucket, along with other tools.
  4. Lasso Fill Tool

    This tool can be a free-form lasso, a polygon lasso, or a specific shape.  As soon as you are done drawing the shape, it fills with your foreground color automatically onto the canvas.

    1. Great for making smooth, irregular shapes when the Stabilization is set very high.
    2. Great for blocking in large areas of black or color.
    3. Great for quickly deleting large areas (when painting with transparency).
  5. Selection Pen Tool

    1. This is a special brush that instantly makes your stroke (or strokes if you hold down shift) into a marquee selection.  Great for painting lots of tiny highlights (when coloring with comic book style).
    2. You can configure this brush just like any other, with different brush shapes and pressure settings.
  6. Symmetrical Rulers!

    Similar to Autodesk Sketchbook Pro, Manga Studio 5 has some great symmetrical rulers.

    1. Draw a ruler anywhere that will mirror the image in real-time.  This doesn’t appear to slow down my machine at all.
    2. You can even draw up to 8 symmetrical rules at once, which can create some really cool Spiral-Graph-style designs (warning: this will probably slow down your machine a bit).
    3. Huge time saver (50%!).
  7. Gradient Layers

    1. This tool allows you to create a gradient that you can edit and resize (similar to Adobe Illustrator) in real-time even after you’ve laid it down.
    2. Change the size, add/remove colors, and change the spacing of the colors easily until you rasterize the gradient.
    3. You can also use gradients the traditional way if you choose.
  8. See flipped canvas in mirrored window

    1. One of my favorite features.  A trick I learned a while back was to constantly flip my canvas horizontally or vertically, which will make any errors you’ve made stick out like a sore thumb.  But flipping the canvas in Photoshop can take a little while to load (especially if you’re working with a large file), because it actually is transforming and flipping all the pixels on the canvas.
    2. Manga Studio does this in a much cleaner way – it is flipping the view, not the canvas itself.  So the result is instantaneous, and the result isn’t saved in the file.
    3. What’s even better, is that you can draw with one window in the original orientation, while having a second window open with the view flipped, and it’s updated in real-time.  This way you can spot errors as you make them.
  9. Half-tone Layers

    1. Easily editable at any time.  Great for setting up silk-screening artwork.

    2. In Adobe Photoshop, it’s very tedious creating halftones for silk-screening.  You have to output the layer, convert it to a bitmap, then choose a halftone pattern and size (if you don’t like it, you have to repeat the process), then copy and paste the pattern back into Photoshop for each screen.
    3. In Manga Studio, you can instantly change any layer in your document to a half-tone layer, and continuously adjust the size and shape of the halftone pattern, again and again.  You can even paint directly onto this layer, and watch it convert your airbrush strokes into solid dot goodness, with no lag at all.
    4. When you’re done, just rasterize the layer, and you’re all set!
  10. 3D poses

    1. Manga Studio comes with a library of 3D objects and mannequins which can be posed for reference, and dropped right into your artwork.
    2. I find the 3D engine in Manga Studio much more flexible and responsive (although it is suitable for reference only, not rendering – Photoshop takes the cake on that one).More Illustrations I created using Manga Studio 5:
  11. Can create full-color brushes

    1. Similar to Painter and Adobe Illustrator, the brushes you create can have full-color (not just a black and white imprint).
    2. In Adobe Photoshop, all the brushes you create can only be one solid color.
    3. This is great for creating custom textures, repeating icons and elements.
    4. There are also many ways to make the image curve with your stroke, so creating things like chain and rope brushes is very easy and effective.
  12. Better (in my opinion) organization and customization of brush palettes

    1. You can easily create and organize your own groups of brushes on the fly, and add them to your menu, or as a tabbed list.  I find this much easier than saving each brush group, and then replacing or appending it to the current list of brushes (as in Photoshop).
    2. HOWEVER – exporting brushes from Manga Studio is very cumbersome, and definitely needs an update.  While you can upload many brushes at once, you can only export one at a time.
  13. Color Wheel

    1. I have never liked Photoshop’s color picker, and have always preferred Corel Painter’s color wheel.  Manga Studio’s color picker is almost identical to Painter’s.  I find it much easier to quickly pick and adjust colors.
    2. In Adobe Photoshop, I use a plugin called Magic Picker (http://anastasiy.com/colorwheel) which is a great way to emulate a Corel Painter style color picker.  But it would be nice if this feature was built into Photoshop.
    3. NOTE:  Adobe Photoshop CC 2014 finally introduced a Color Picker palette that is similar, but I think it still falls short, because there is no color wheel.
  14. Image movement isn’t LOCKED in a window

    1. When working with two or more windows at once, Photoshop won’t allow you to pan beyond the document bounds unless you are zoomed in to the point that the document bounds exceeds the size of the window.
    2. This is very annoying when working with a Cintiq, because I often like to have the part of the image I’m working on in the center (where it’s most comfortable to draw), so I pan the canvas around a lot.
  15. Smart Paint Bucket

    In Adobe Photoshop, the paint bucket in my opinion was so useless that I simply forgot about it.  In Manga Studio, I actually use it quite frequently, because it’s so much more effective and customizable.

    1. You can make the fill area expand or shrink by a certain number of pixels, which is very helpful when coloring underneath lineart to avoid ghost outlines where the anti-aliasing of the lineart meets the color fill.
    2. You can control the sensitivity of what the bucket considers a closed area.  This is the Close Gap feature.  This is extremely useful, because I often don’t enclose my shapes completely with lineart.  If there is just a tiny gap, it will still fill the area as if it were closed.
    3. Very useful when set to reference layers, because you can use data from a layer that is out of sight.
  16. Smart Magic Wand

    The same goes for the magic wand.  It’s extremely customizable and flexible compared to the two parameters Adobe Photoshop offers.

    1. Can also be set to automatically expand or shrink the selected area immediately after clicking.  This is useful because I would often make a selection in Adobe Photoshop, and then go to Expand Selection by a couple pixels to make sure my color and lineart overlapped.
    2. Can also close gaps.
    3. Can select from layers other than the one you are currently editing.
  17. Layer Property menu

    1. You can change the entire color of a layer’s contents easily.  This is particularly useful when designing artwork for silk-screen applications.  Each layer can be painted with black, but it can appear on screen as a different color.  You can apply this effect to an entire group – which allows a quick way to make sure every layer in your group is the same color.

    2. Great for turning pencils into “non-photo” blue when inking.
  18. Edit/delete from multiple layers at once

    This is something that I’ve waned in Photoshop for quite some time.  If you make a selection in Manga Studio 5, and then OPTION+CLICK each layer that you want to delete from, and then hit delete, it will delete content in that selected area from ALL those layers at once.  In Adobe Photoshop, you’d have to hit delete individually for each layer you want to delete from.

    1. Can even make a whole group into a clipping mask.
    2. Easily delete a selection from a multiple layers at once.
  19. Copy/Paste from multiple layers

    Even better is the ability to copy and paste from multiple layers at once.

    1. You can make a selection with the lasso tool, then highlight multiple layers, and copy (or cut) and paste the artwork into new layers in one action.
    2. The only way to do this in Adobe Photoshop would be to put the layers into a group, and mask the group.
    3. Copy Merged is also a solution, but this is only useful if you don’t mind the layers being merged.
  20. Smaller File Size

    1. A PSD saved in Manga Studio is about 30% smaller than the same exact file saved in Photoshop.  I’m not sure why this is – perhaps Photoshop is saving a lot of extra data that I don’t usually use.
      More Illustrations I created using Manga Studio 5:
  21. Subview window for reference and color picking

    This is a cool tool that I think is exclusive to Manga Studio.

    1. It’s a palette that opens a preview of any image without actually opening the file, and keeps in on display for reference or color picking.

    2. Also, you can open many files at once in this window, and just flip between them.
    3. Your cursor instantly becomes an eye-dropper tool when you hover over it, making it a virtual palette.
    4. This is very useful when working on something like a children’s book or comic book when there are a lot of the same characters that you need to redraw with the same colors.
  22. Mesh Transform multiple layers at once

    1. Manga Studio’s mesh transform tool is better (in my opinion) than Photoshop’s Warp Transform tool, because you can transform an entire grouping of layers at once.  In Photoshop, you can only Warp Transform one layer at a time.  This usually forced me to merge layers when I didn’t want to.
    2. You can also add mesh points (similar to Adobe Illustrator) to give you more precise control over your transformations.
    3. However, it falls short when compared to Adobe Photoshop’s liquify tool.
  23. Periodic Backups

    1. The program automatically saves iterations of you file as you work on it, just in case the unthinkable happens.  If, for example, you accidentally flatten your image, you can then go into the Manga Studio Library folder (on Mac) and find your file.
    2. It only keeps a certain number of backups total as temporary files, so you don’t have to worry about managing these files to manage space.
    3. Adobe Photoshop CC saves backups – however, these are only saved and accessible if the program has crashed.
  24. Undo whole group of strokes in one “Undo” action

    1. Often, you might make a whole series of quick strokes with the brush (say for example, 10 brushstrokes), and then decide you don’t like what you’ve done.  In Adobe Photoshop, you’d have to hit Undo 10 times.  In Manga Studio, it sees these quick strokes as one action, so it will undo the whole series.
    2. You can adjust how Manga Studio groups the brushstrokes (as well as turning this feature off).
  25. Convert Brightness To Opacity

    1. In one step (accessed from the Edit menu), you can cleanly remove the “white” or light areas and turn them into transparency.
    2. This is very useful for extracting flattened lineart from scans.
    3. In Adobe Photoshop, I normally did this in the Channels palette – but I find that Manga Studio does a much more accurate job.
  26. Draw straight lines while holding shift

    1. Unlike Photoshop, this feature shows you a preview of where your line will be as you hold shift, which is very useful.
    2. Stroke is unaffected by pen pressure (won’t get smaller toward the end), unlike Adobe Photoshop (which I always found annoying, because if I’m drawing a straight line, I usually want it to be the same thickness throughout).
  27. Rulers!

    1. There is an incredible number of rulers you can use in real-time on your canvas.
      1. Curves
      2. Parallel lines
      3. Ellipses
      4. Concentric circles
      5. Focus line
      6. Perspective Rulers (awesome!)
    2. The rulers are easily moveable, adjustable, and resizable, just by holding the CMD key as you hover over a ruler.  No need to switch tools.
    3. You can also easily toggle them on and off just with a keyboard shortcut – so it’s easy to flip back and forth between free-hand drawing and ruled-drawing.
    4. You can even draw your own rulers using the Ruler Pen!

Improvements made from Manga Studio 4

  1. Overall better User Interface
    1. The MS4 interface was a bit clunky, and felt like Windows 2000, with palettes floating everywhere.
    2. The new interface combines the best things of both Adobe Photoshop and Corel Painter.
    3. You can now rearrange and dock palettes, and collapse menus.  This is the most customizable interface of all the other software I’ve mentioned so far.
    4. You can now save different Workspaces.
  2. Improved file-handling

    1. Fixed strange file saving structure (used to be in a folder)

    2. You can now work on documents as large as 166 inches square (the limit was only 16 inches in MS 4).

  3. Much improved brush engine

    1. Tons of options (maybe too many)

    2. Lock editability of brush

  4. Much less limited image size

    1. In EX4, you were limited to 16 inch documents, which becomes tricky when designing T-Shirts.

  5. Ruler system greatly improved.

    1. EX4’s rulers were complicated, and difficult to edit.

    2. Now you can easily turn on and off a ruler, or move it to other layers.

    3. Perspective rulers also seem easier to use.

  6. Coloring greatly improved

    1. Import color swatches from Photoshop, and save them.

    2. Tons of new painting tools similar to Painter

    3. Active color wheel like Painter

  7. Added blending modes similar to Adobe Photoshop
    1. Nearly all the blending modes (for both layers and brushes) you’d come to expect are now here.  There are a few additions too that Photoshop doesn’t have, such as Glow Dodge (which is similar to Linear Dodge in Photoshop).
    2. My only complaint is that a Color blending mode appears to be missing – Soft Light works well as a substitute.
  8. Much improved layer and layer group system
    1. I found MX4’s layer system to be too complicated.  The new system mirrors Adobe Photoshop in all the good ways.


Thanks for reading!  If I’ve missed any features, or if you have any questions, please leave them in the comments section.

To check out more of my work, or to hire me:

https://www.flylanddesigns.com

I was fortunate enough to be interviewed by the TShirtonomy.com, a site that features new t-shirt design trends and artwork.

I’m humbled to be a part of their impressive lineup!  If you’re interested in learning a little more about me, and how I design T-Shirts, check out the full interview here:

It’s been a while between artist interviews, but today we’re very lucky to have had the opportunity to interview the extremely talented Brian Allen of Flyland Designs.com

How would you introduce yourself and your art to people who may not familiar with you?

My name is Brian Allen, I am a full-time freelance illustrator working in my studio called FlylandDesigns.com. I’ve got a wife, two kids, and a lawn to mow. Life is good! I’m really a pretty ordinary guy – In fact, my artwork and the clients I work with are often a lot cooler than I am!

I work with small businesses, bands, and large companies as well, like Hard Rock Cafe, Spiral Direct, and American Greetings.

How did you get started designing t-shirts?

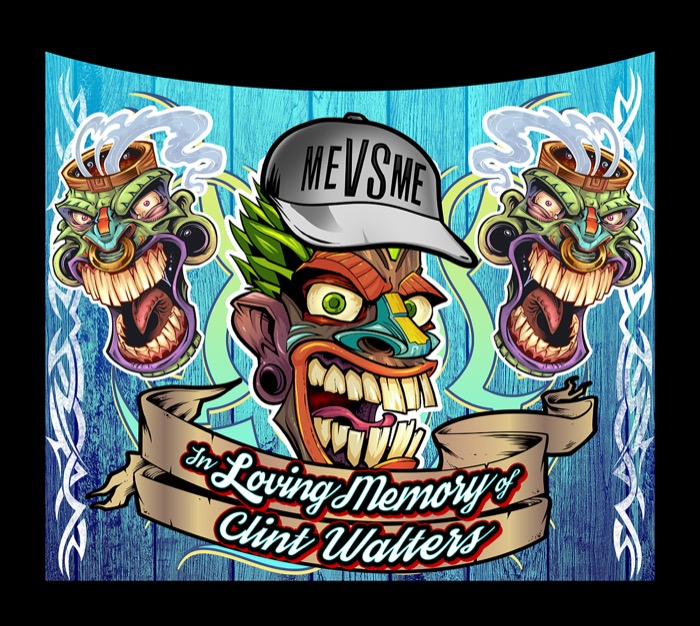
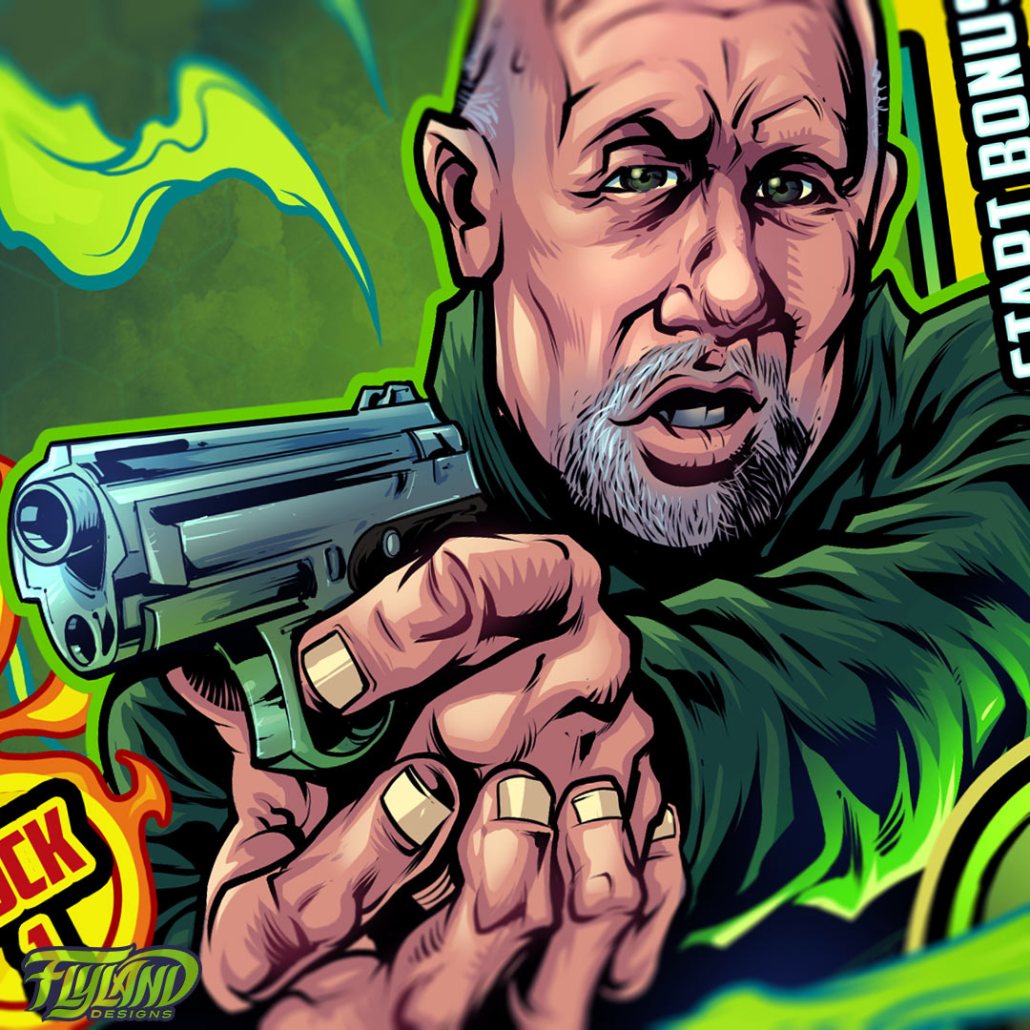
I love designing t-shirts, but I actually never set out to specialize in that as much as I am now. When I first started as a freelancer illustrator, I was grabbing any job I could get (even web design, which I am quite terrible at). As my artwork starting getting better and my portfolio became more focused, I started getting a flood of T-Shirt projects. This made sense, I guess, because my artwork is line-art driven, and usually high-contrast and colorful, which are the main ingredients for some cool T-Shirts.

I quickly hunted out every resource I could to learn how to design for shirts, and the complicated process of silk-screening. It was a bit of a clumsy process at first, but I’ve learned a lot from talking with other artists and printers since then.

What inspires your work?

I make a point to seek out artists and follow their work on social networks like Facebook, Instagram, Behance, and Mintees. It’s so amazing how easy it is to quickly put together a feed of amazing artwork. It can also be overwhelming and intimidating if you’re not careful.

Other than that, I draw a lot of inspiration from the pop culture that I grew up with in the 80s and early 90s. Movies, comics, and music of that era.

Can you give us any insight into your creative process?

For many years, I used to draw and ink on paper, and color digitally in Photoshop. About four years ago, I switched to a 100% digital workflow once I discovered the Wacom Cintiq, which is a monitor and tablet combined. I feel my artwork improved a lot about two years ago, when I switched to Manga Studio 5 for most of my process. In my opinion, it is the best piece of software for drawing and inking, and it has a ton of cool features (like painting with halftones) that make designing t-shirts efficient and enjoyable.

I typically start my designs with a series of rough thumbnails. After choosing the best one, I blow it up, and draw over top. Once I’ve got a pretty clear drawing, I usually turn the color to a light blue, and carefully ink the image. My artwork is usually heavily line-art driven, so my coloring process is similar to the techniques used by comic book artists. I drop in the flat colors, make a copy of that layer, and use the flat color layer to make quick selections as a apply the shading, highlights and rendering. When designing T-Shirts, I typically keep each color on a separate layer, to make the separation process easier.

Which is your favorite design of your own?

My favorite design was a full-color direct-to-garment design I created as a personal project called “Take-Out,” featuring a crazy looking alien with a hot-looking redneck girl tied to the hood of his hot-rod/spaceship. There’s just something about this piece where everything worked (which is rarely the case), and if every project I worked on was exactly like this, I’d be perfectly happy.

Which has been your most successful design to-date?

I believe the most popular design I’ve created was a parody illustration of Cheech and Chong as zombies. The silk-screening was perfect, and the posts about the image were shared more than and reached more people than any other posts I’ve made. It was even featured on Cheech and Chong’s own social media outlets. The design was created for an apparel brand called Marijuana Zombie.

Who are some of your favorite artists?

H.R. Giger and Luis Royo.

Favorite T-Shirt designers: Angry Blue, Godmachine, Dane Henry JrFelix LaFlamme.

What are some of your interests outside of art?

My family and I love camping – there are a lot of great places to go here in Pennsylvania, and it’s a lot of fun now that my kids are big enough that I don’t have to worry about them getting carried off by squirrels.

What are your vices?

I often get myself into trouble by taking too many things on at once. I’ll end up trying to go in too many directions at once, and then I can’t really focus enough on any one thing. I’m working on it!

Hypothetical dinner party, you and any two people, dead or alive, who do you choose?

Louis C.K. – I admire his ambition and complete devotion to his art. I heard that every year he completely throws away his previous act, and starts over from scratch, never telling the same joke from the previous year again. I wish I was that fearless!

Ronnie James Dio – Because … well, because Dio.

Are you currently working on anything we should keep an eye out for?

I recently partnered with RageOn.com, the largest distributor of dye-sublimated apparel. I’ve opened up a shop with them, and they will be selling many of my designs exclusively. What makes them different than other T-Shirt sites is that they print the design on every inch of the shirt – even the shoulders and sleeves – and the designs are in full color.

I recently created a design I’m excited about featuring Kermit and Ms. Piggy as a pimp and ho entitled “Pig Pimpin.” You can.

———

Thanks for your time Brian, we look forward to seeing more from you in the future!

You can checkout all of Brian’s work on his website, here: https://www.flylanddesigns.com

He’s also on Facebook, Instagram, Twitter, and Behance.

Client:

Explicit Airbrush

Description:

T-Shirt design I illustrated of a skeleton with dual airbrushes for the awesome airbrush shop Explicit Airbrush. The client and owner of the shop is an artist himself, so I had a lot of fun as our collective minds grew this illustration. This design is set up for Direct-to-garment printing.

T-Shirt illustration of a evil skeleton with airbrushes and smoke

T-Shirt illustration of a evil skeleton with airbrushes and smoke

T-Shirt illustration of a evil skeleton with airbrushes and smoke

T-Shirt illustration of a evil skeleton with airbrushes and smoke

Check out more of my T-Shirt designs here.

Click here to see more of my Dark Illustrations

Client:

Great Dane Graphics

Description:

Illustration of a gator leaping out of a swamp I created for Great Dane Graphics, in a pitch for the contract for Swamp People, the TV series about people living and working in the swamps of Louisiana. This was the first time I was tasked with drawing a fully rendered alligator, and it proved to be more challenging than I thought to find the right pose.

Illustration of an alligator jumping out of a swamp

Illustration of an alligator jumping out of a swamp

Illustration of an alligator jumping out of a swamp

Check out more of my T-Shirt designs here.

Tag Archive for: art